
Interesting for some and scary for others, assembling a CPU is quite a roller coaster! It has a plethora of parts that you must install perfectly for it to work well. Any glitch can cause multiple problems. This is why many people leave the installation to the experts even if it means having to spend some money.
However, we think you should know how to install the various components yourself. Yes, there are many details involved, but it is also no rocket science, honestly. In this article, we will discuss how to install a CPU cooler, and you will see for yourself that you don’t need a professional degree for this. You just need patience and focus.
To start off with, let us tell you that the process of installing a CPU cooler on an Intel processor is different from the process you should follow for an AMD processor. We are going to discuss both.
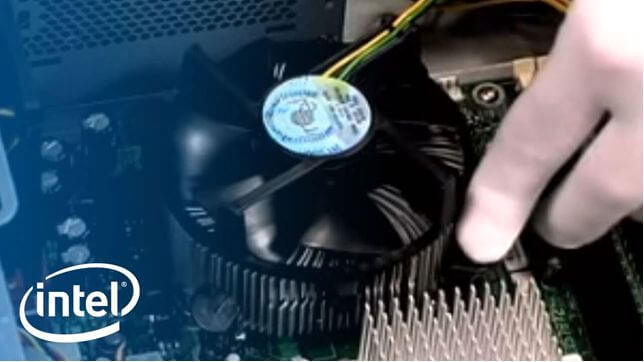
How to install a CPU cooler on an Intel processor
- Check the CPU’s placement: The CPU needs to be secure in its socket. This can be slightly tricky for Intel processors because their pins are within the socket. Check by lifting the load lever slowly. The cover plate and the CPU should separate. The CPU should be flat for the cover plate also to be flat. Lower it back slowly ensuring that it is in place. You can only insert the CPU in one way. So, if there is a problem, you will know right away.
- Get cleaning: Everything you work with must be clean, and this includes the heat-sink surface as well as the processor. Use isopropyl alcohol and a lint-free cloth to get rid of all the dirt and dust. This is necessary to ensure complete contact between the two surfaces.
- Use thermal paste for priming: Now, you must start priming the heat-sink surface and the CPU. Use a little thermal paste (Do not go overboard here.) and fill all the imperfections to get a smooth surface. The primer also helps in lubrication, making it easier to apply the thermal interface material, which we will discuss in the next step.
- Apply the thermal interface material (TIM): Use a silver-based thermal paste for this process. You can also use a ceramic-based paste if you prefer. Apply a very thin layer on the metal surface and make sure it is even. You shouldn’t use more than a tiny drop, and the layer shouldn’t be thicker than paper. This is very important to ensure proper heat transfer.
- Install the CPU cooler: Finally, it is time to install the CPU cooler! Most of the Intel CPU coolers come with plastic pushpins. You just need to insert these into the holes that you see on the motherboard. Lower the cooler while holding it level. Don’t tilt it on either side. Otherwise, the thermal paste won’t spread evenly. Make sure it is flat, and the pins are perfectly inside the holes. If they are not, the heat sink won’t sit perfectly, and your processor will overheat anyway. Once you insert the cooler, check if it is securely in place. Tug it slightly, and you will understand. Now, just connect the connector to the header on the motherboard and you are done.
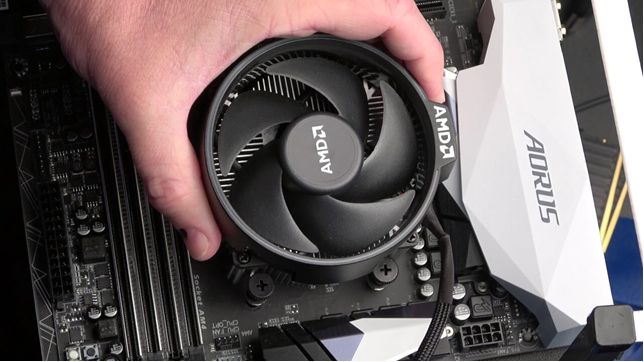
How to install a CPU cooler on an AMD processor
The main steps are pretty much the same for both processors but a few details are different, and you must pay attention to them.
- Check the placement: AMD processors have many types of sockets, but the installation process remains the same for all of them. Just like with Intel processors, all you have to do is to lift the lever for socket retention and press the CPU downward with a little pressure. Now, lower the lever so that the CPU sits in its place. If there’s any disturbance, you will be able to make out visually. Try the process again if you aren’t satisfied.
- Get cleaning: There should be no contaminants on the heat-sink surface or on the CPU. Clean everything delicately but nicely with a lint-free cloth using isopropyl alcohol.
- Use thermal paste for priming: This step is pretty much like we mentioned earlier. So, we will not get into the details. Use little thermal paste and eliminate all air gaps by applying a thin layer.
- Now, apply the TIM: A small drop of the thermal interface material is enough for this. Don’t apply too much or there will be ugly blobs of the material that will hinder thermal transfer.
- Install the CPU cooler now: This is where the biggest difference between AMD and Intel processors is. AMD processors usually have a latching mechanism that makes installation very easy. However, you must be careful so that you do it well. Lower the heat sink and latch it in place. Apply pressure wherever needed but not too much. Make sure it is parallel to the surface and never tilting to any side. Now, secure the cooler in place with whatever locking mechanism your cooler came with.
The process may look tedious when you go through it but trust us, it is not really cumbersome. Once you start following the steps, you will know that it is not much of a hassle. However, if you don’t feel confident or if tech DIY is not your thing, we would recommend that you ask a professional to help you with it. The reason why we are suggesting this is that the process has details that need more focus and confidence. If you are shaky or restless, things will go south and may become irreparable. For example, if you fail to install the cooler properly, the CPU will overheat and may be even stop functioning. Imagine the cost of the repairs then!
We hope our article helped you find what you were looking for. Please give it a shot and tell us what you think in Comments. We are happy to help you further if the need arises. All the best!
Chris Mcdonald has been the lead news writer at complete connection. His passion for helping people in all aspects of online marketing flows through in the expert industry coverage he provides. Chris is also an author of tech blog Area19delegate. He likes spending his time with family, studying martial arts and plucking fat bass guitar strings.