You have clicked numerous photos on your iPhone during Christmas and now you want to transfer them to a laptop or another phone. Though, if you are facing any kind of problem in the process, then you have come to the right place. We have got just the perfect solutions for you to save your family Christmas photos. In this guide, we will cover three solutions to transfer photos from iPhone to Android, iOS, or computer. So let’s begin and learn how to transfer photos from iPhone to laptop or other smartphones.
Method 1: How to Transfer Photos from iPhone to Laptop Seamlessly?
If you wish to maintain a backup of your Christmas photos and save them on your computer, then try dr.fone – Transfer (iOS). It is a complete iOS device manager and can easily move all kinds of data between different sources. A part of the dr.fone toolkit, it provides highly secure and user-friendly solutions to transfer data.
- It can transfer photos from iPhone to computer and vice-versa.
- The tool can even rebuild iTunes library without using iTunes.
- There is also a provision to move photos from one iOS device to another.
- It can also transfer videos, music, contacts, and messages apart from photos.
- Users can get a preview of their photos and transfer them selectively to any location of their choice.
- It is a 100% secure application which is extremely easy to use
The tool is available for both Mac and Windows. You can also download its free trial from its website. To learn how to transfer photos from iPhone to laptop, follow these steps:
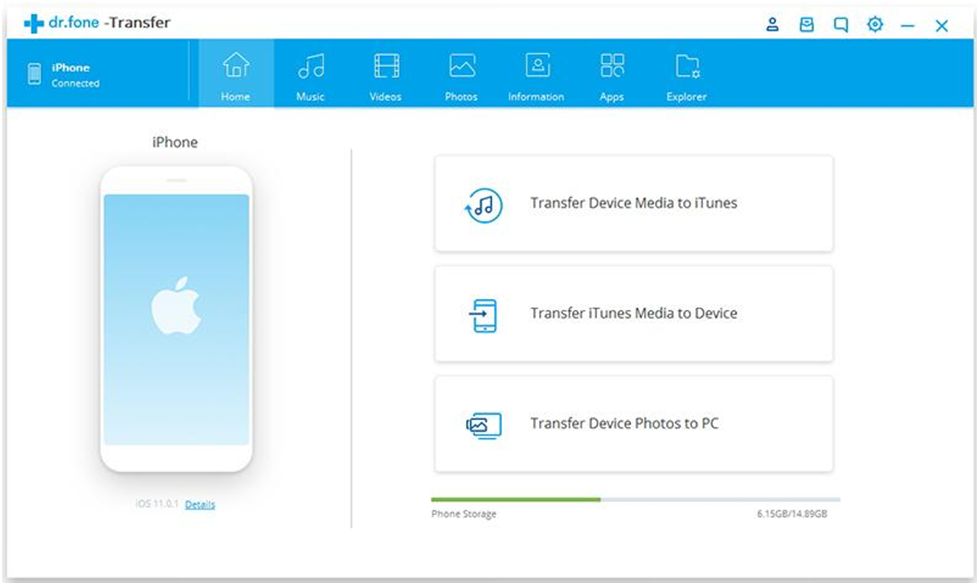
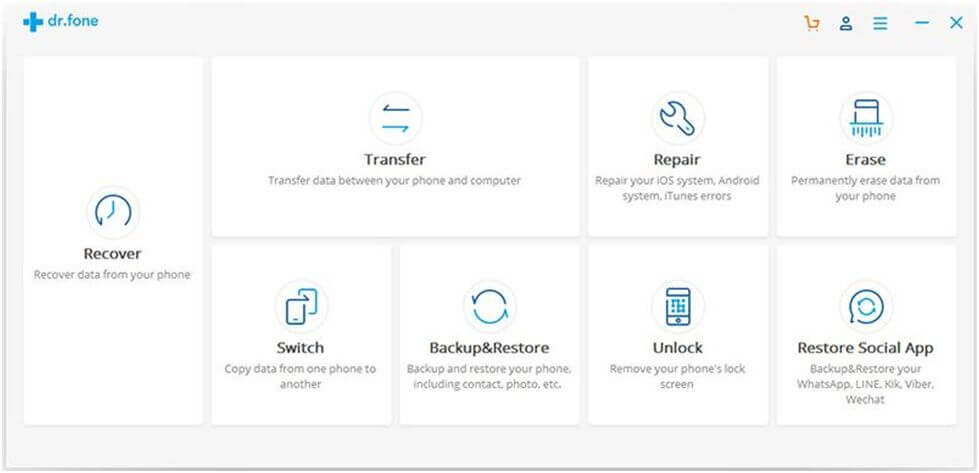
1. Install and launch dr.fone – Transfer (iOS) on your computer. From its home screen, visit the “Transfer” module.

2. Connect your phone to the system using a working cable. Once it gets detected, you will get its snapshot with some shortcuts on the screen.
3. From the provided options, click on “Transfer Device Photos to PC” if you wish to transfer all photos in one go.
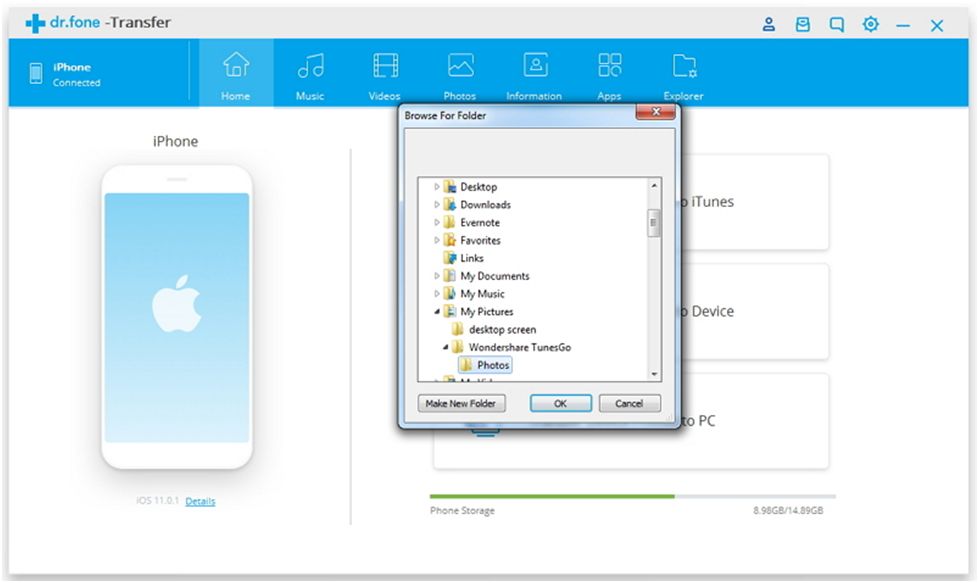
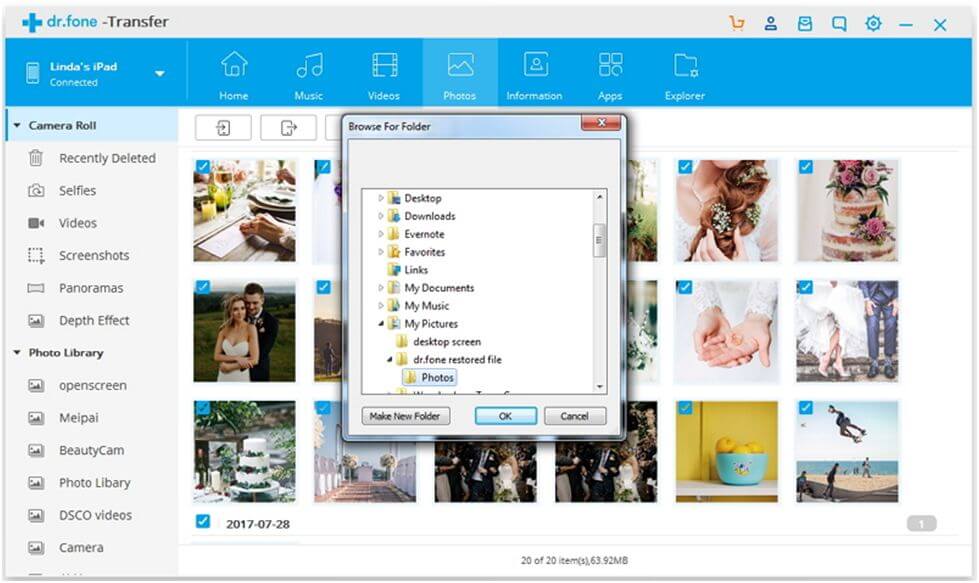
4. A pop-up window will be launched so that you can just browse to the location where you wish to save your photos.
5. To perform a selective transfer of data, simply visit the “Photos” tab. Here, you can get a preview of all the saved photos.
6. Simply select the photos or albums that you wish to transfer. Go to the export icon on its toolbar and export the selected photos to your computer.
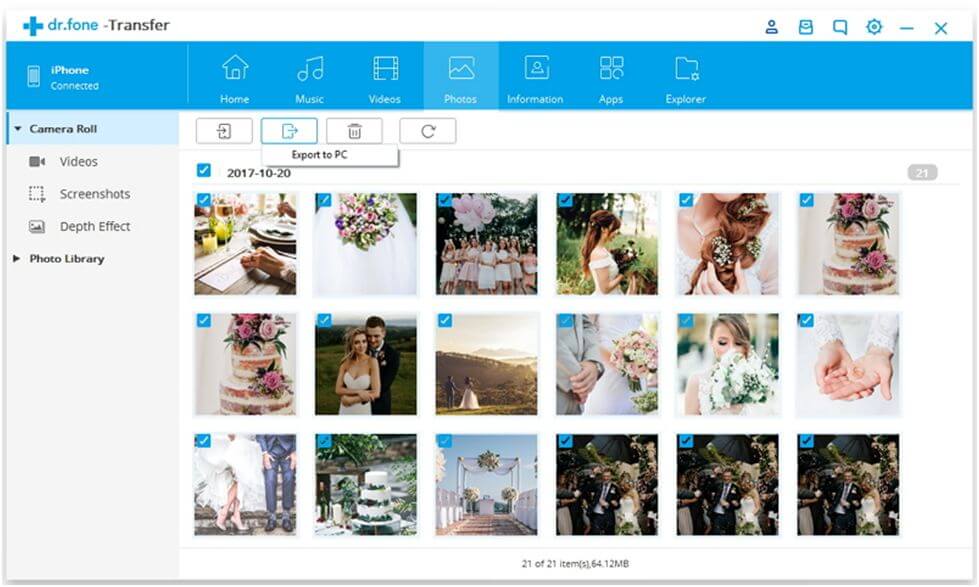
7. Browse to the location where you wish to save these pictures and start the transfer process.
Method 2: One-click Device to Device Photo Transfer Solution
In case if you wish to transfer photos from iPhone to Android or iPhone to iPhone, then take the assistance of dr.fone – Switch. It can transfer your data directly from one device to another. The tool supports all the leading iOS and Android models and can also do a cross-platform transfer of data.
- It provides a fast one-click and secure solution to directly transfer photos from one device to another.
- You can transfer your data from one iOS device to another and even from iOS to Android (and vice versa).
- Besides photos, it can also transfer videos, contacts, messages, music, call logs, and other types of data.
- Users can select the kind of content they wish to transfer.
- All the data would be protected and kept intact. You don’t have to worry about any data leak or losing the quality of your content.
The tool supports all the major iOS models like iPhone XS, XS Max, XR, X, and so on. It runs on Windows and Mac and comes with a free trial version as well. Here’s how you can use it.
1. Launch the dr.fone toolkit on your system and visit the “Switch” section from its home.
2. Using authentic cables, you can connect both the devices to your computer and wait for them to be detected automatically.
3. The snapshot of both the devices will be displayed. Your existing iPhone should be the source device and the target Android or iPhone should be the target device. If not, use the Flip button to change their positions.
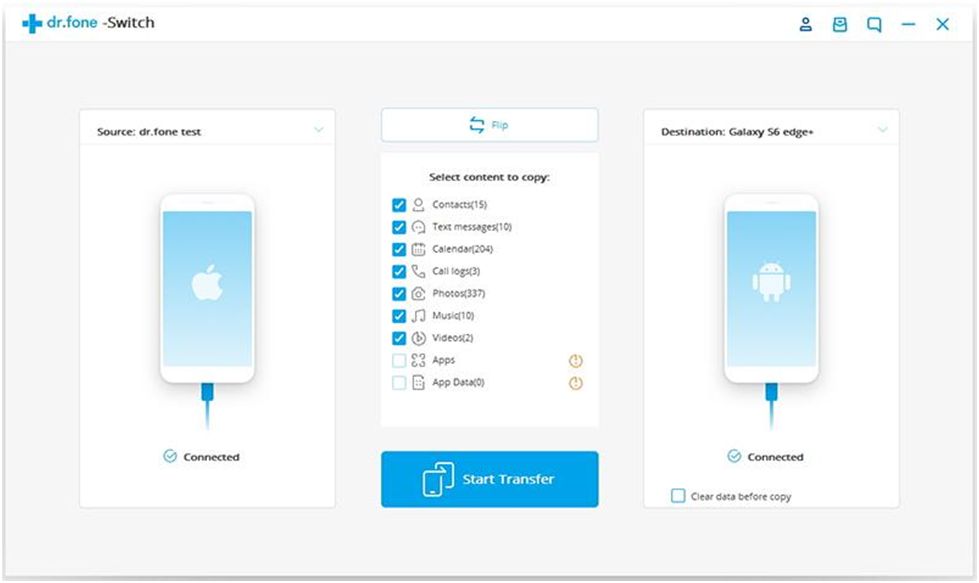
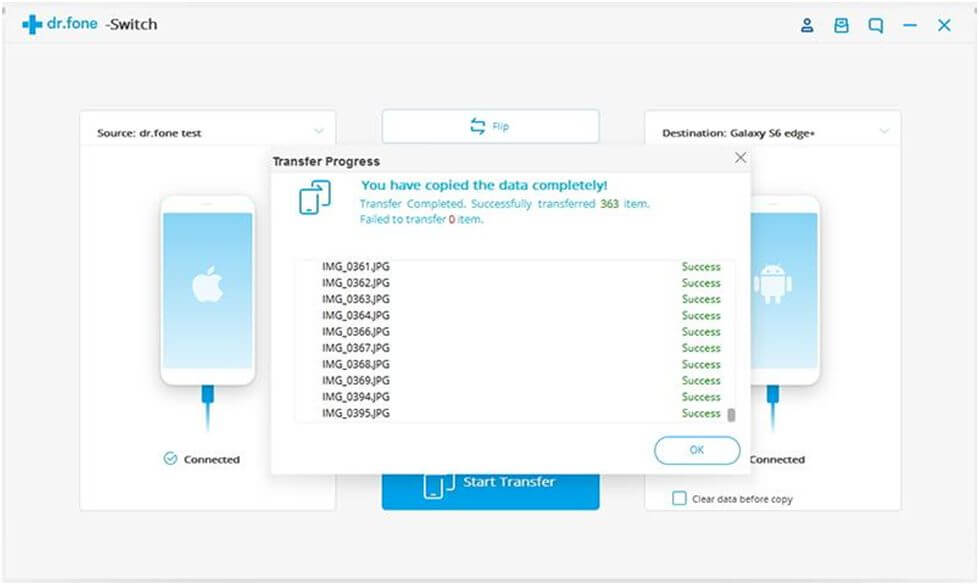
4. Now, simply select the type of data you wish to transfer. In this case, it is “Photos”. Click on the “Start Transfer” button and wait for a while as the application would directly transfer your data.
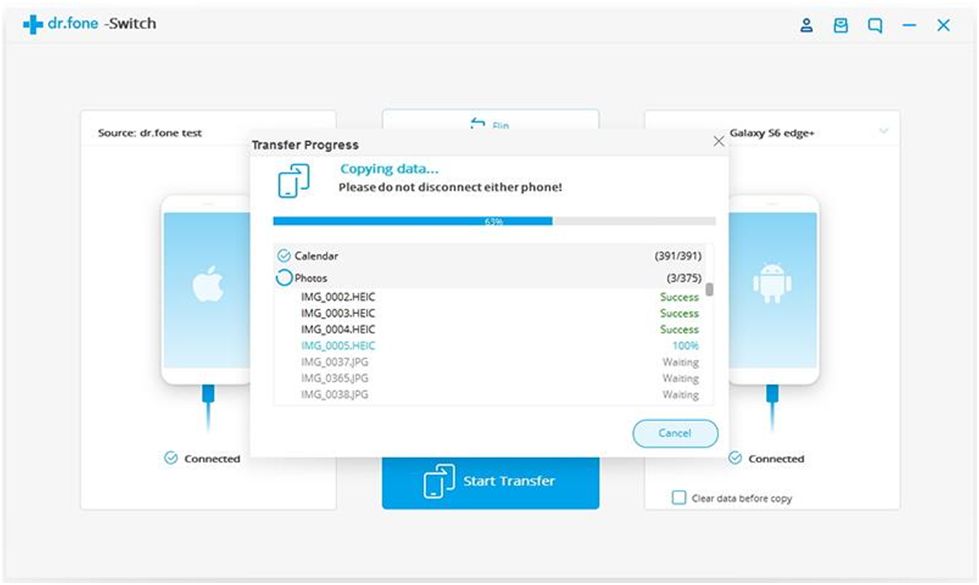
5. In the end, when the process is completed, you will be notified. You can now remove both the devices safely.
Method 3: Transfer iPhone Data Wirelessly with iCloud
As you know, every iOS device is linked to an iCloud account. Therefore, you can take its assistance to store your photos and transfer them wirelessly as well. By default, users only get 5 GB of free space on iCloud. If you want, you can buy more space for your account as well. The iCloud application can be used on Windows as well as Mac. Follow these steps to learn how to transfer photos from iPhone to laptop.
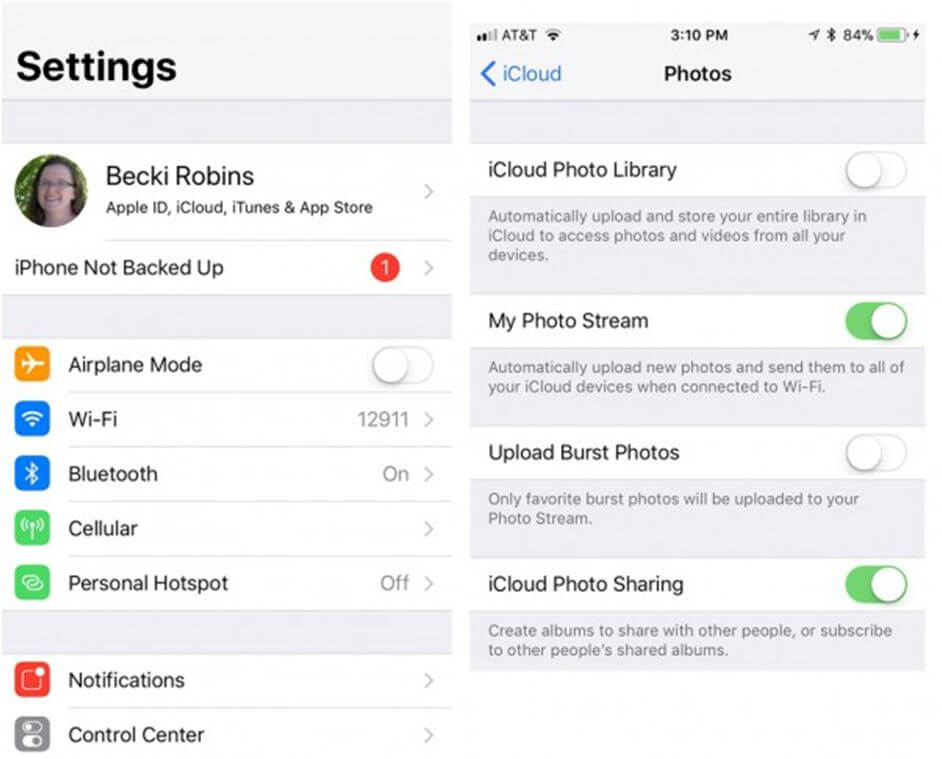
1. Unlock your iOS device and go to its iCloud settings. From here, you need to enable the option of “iCloud Photos Library”. This will automatically upload all your photos to iCloud.
2. To access them on your Mac or Windows PC, launch the iCloud application and turn on the Photos sync feature.
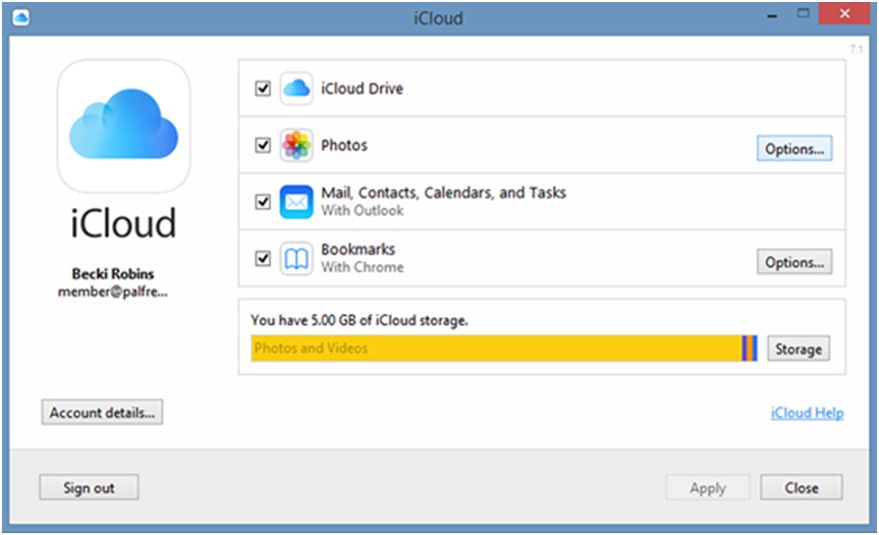
3. Visit its Photos Options and enable the “iCloud Photos Library” feature. You can also select a location to save your photos as well.

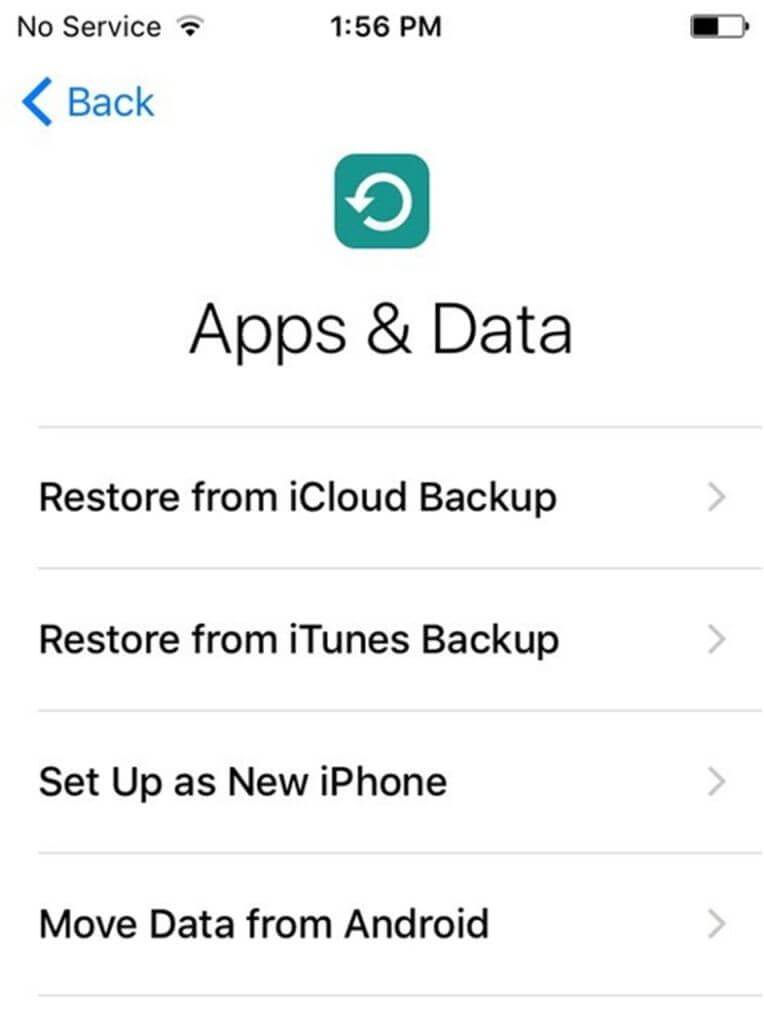
4. If you want to transfer photos to another iOS device, then choose to restore data from iCloud backup. You will only get this option while setting up a new device.
After following these methods, you would certainly be able to transfer photos from iPhone to Android, iPhone, Mac, and Windows. To perform a direct device to device transfer, you can use dr.fone – Switch. Though, if your aim is to transfer family Christmas photos to your Windows or Mac system, then simply give dr.fone – Transfer (iOS) a try. Both of these tools are extremely useful and will you transfer your data across different sources in seconds.
Chris Mcdonald has been the lead news writer at complete connection. His passion for helping people in all aspects of online marketing flows through in the expert industry coverage he provides. Chris is also an author of tech blog Area19delegate. He likes spending his time with family, studying martial arts and plucking fat bass guitar strings.