
Magento is well-known for its flexibility, high-quality performance, and ability to support businesses of all sizes. It’s packed with functionality that budding entrepreneurs require to efficiently build and scale their operations and boost their reach globally.
Perhaps one of its most powerful features is the ability to support multiple websites using a single installation. This feature allows businesses operating across various regions and industries to manage all their ecommerce operations from a single channel. It also brings down the costs of custom Magento development because you only have one application that needs to be configured and integrated with your ERP system.
In this article, we’ll go over how to configure Magento 2 multistore so that you can boost your business without complicating your operations.
What is Magento 2 multistore?
Magento 2 multistore is a setup that can be configured using the Global, Website, Store, and Store-view hierarchy system in Magento to create and run multiple websites from a single installation.
Each website can be configured to have an independent default language, domain name, set of categories, products, and currency — all using a single codebase that can be managed from one Magento admin panel.
How to configure Magento 2 multistore
Magento’s developers have simplified the process of setting up a multistore operation to the point that most store owners can do it themselves.
However, setting it up properly is essential to ensuring your new store doesn’t affect the performance or configuration of your existing website.
Let’s look at how you can configure your Magento 2 multistore in a few easy steps.
Step 1: (Optional) Create root categories
To start configuring your Magento 2 store for multistore use, you need to log in to your Magento admin panel as an administrator and create a unique root category for each website.
Although this is an optional step, it will help you categorize products across multiple websites more efficiently.
- Head over to Catalog > Categories and select ‘Add Root Category’.
- Enter a unique name in the ‘Category Name’ field to identify your new root category.
- Set ‘Enable Category’ to Yes and click Save.
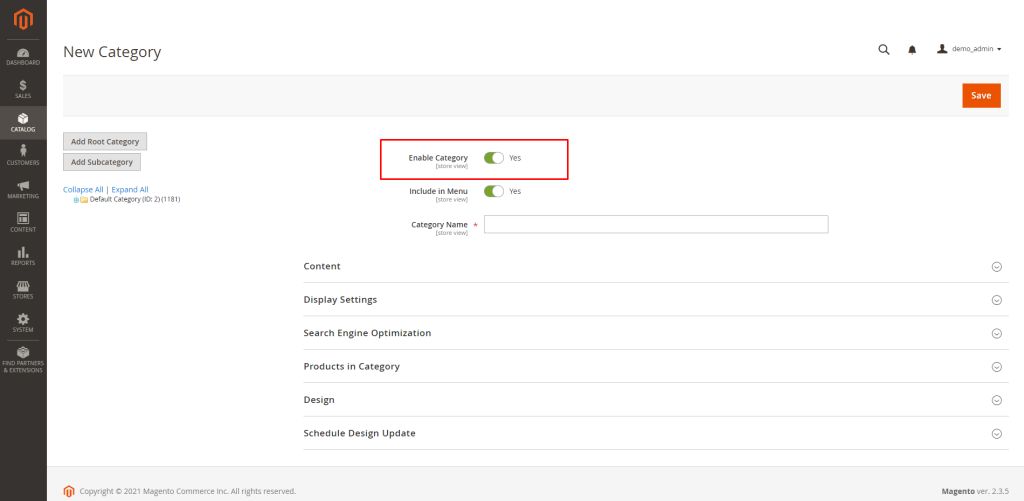
You can repeat this process each time you wish to add a new category before setting up a new website.
Step 2: Create websites
A fresh Magento 2 installation operates with a single default website called ‘Main Website’. Each new website you create can have exclusive configurations like shipping, taxes, and payment gateways.
- Head over to Stores > Settings > All Stores and click on ‘Create Website’.
- Enter a name to identify your website, a unique code for your website, and a sort order number.
- Once completed, click on ‘Save Web Site’.
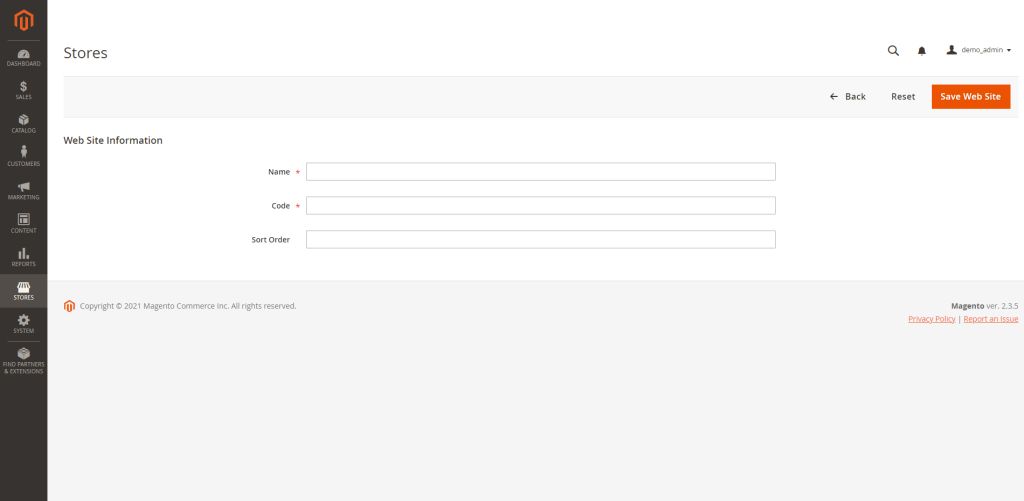
You may repeat this as often as required to add multiple websites.
Step 3: Create stores
Now, it’s time to create a store under the newly created website. A single website can have multiple stores assigned to it, so you can repeat this process multiple times if you need to add additional stores to a website.
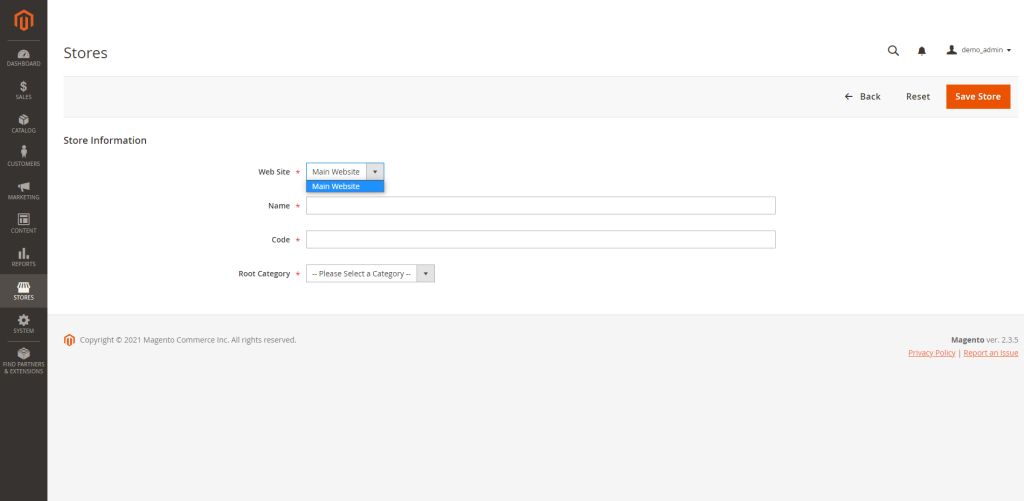
- Navigate to Stores > Settings > All Stores and click on ‘Create Store’.
- From the dropdown, select the website you wish to associate the store with.
- Next, enter a name and unique code to identify the store.
- Then select a root category from the dropdown and click ‘Save’ once completed.
Step 4: Create store views
By default, each store has a single store view. You can create additional store views if you wish to offer multilanguage support on your store.
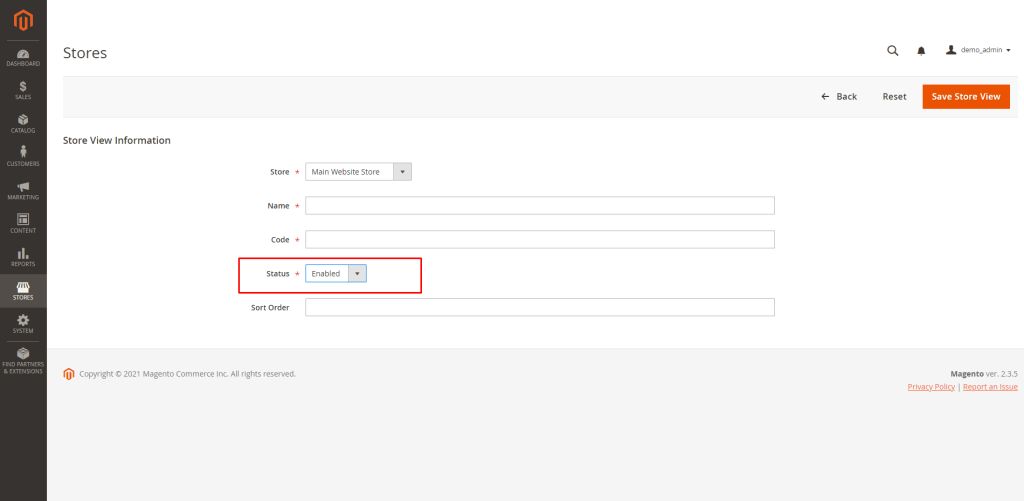
- Head over to Stores > Settings > All Stores and click on ‘Create Store View’.
- Select the name of the store you wish to create a store view for and enter a name and unique code to identify the store view.
- Next, set the ‘Status’ to ‘Enabled’ and click ‘Save’.
Step 5: Set the new website’s base URL
- First, go to Stores > Settings > Configuration > General > Web.
- On the top left-hand side of the page, select your website’s name from the dropdown next to ‘Store View’.
- Next, expand ‘Base URLs’ and enter the URL or subdomain you would like to set for your new website.
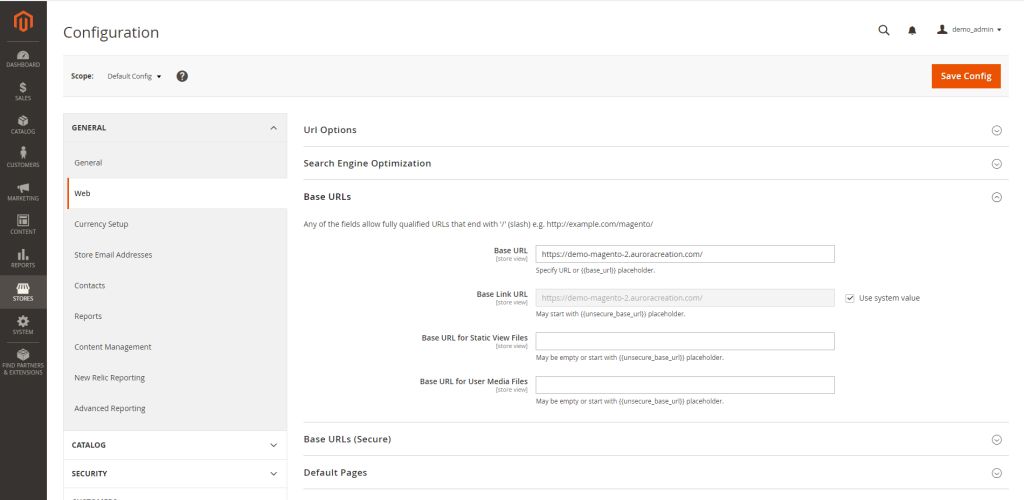
Repeat this step in the ‘Base URLs (Secure)’ section and click on ‘Save Config’.
Step 6: Add the store code to the newly configured base URL
To avoid the hassle of creating new directories on your server for the .htaccess and index.php files for your new websites, Magento allows you to add your store code to the site’s base URL from inside the admin panel.
To add the store code to your site’s base URLs, follow these steps:
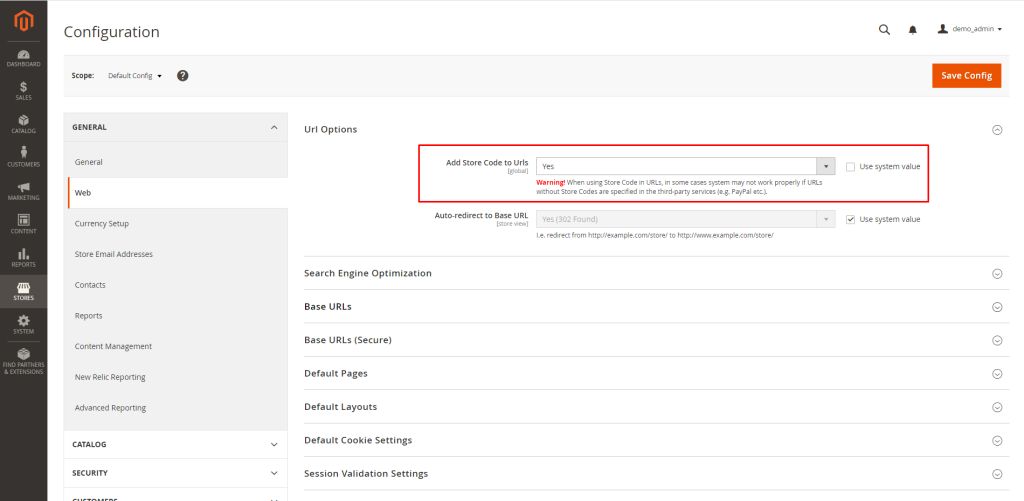
- Go to Stores > Settings > Configuration > General > Web, and set the ‘Store View’ option on the top left-hand side of the window to ‘Default Config’.
- Next, expand ‘URL options’ and set ‘Add Store Code to URLs’ to ‘Yes’.
- After this, click ‘Save Config’ and then flush Magento cache from System > Cache Management.
Step 7: Change the default store view base URL
This is the last step to be carried out inside the Magento admin because you will lose access to the admin panel after this. It will only be restored once you reconfigure your web server application.
- First, go to Stores > Settings > Configuration > General > Web and set the ‘Store View’ on the top left to ‘Default Config’.
- Next, expand the ‘Base URLs’ section and update Base URL, Base Link URL fields to your website’s top-level domain URL.
- Expand the ‘Base URLs (Secure)’ section and repeat the previous step.
- Finally, click on ‘Save Config’.
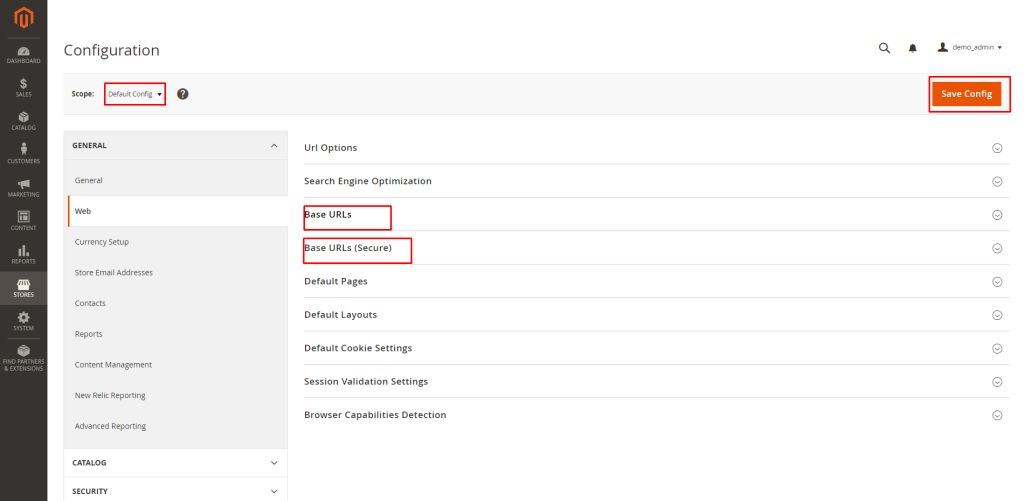
You will lose access to your Magento admin after this; however, we’ll restore it by reconfiguring our web servers in the next step.
Step 8: Configure your web server to work with your multistore setup
The processes to configure Magento 2 multistore to work with Apache and Nginx are different. Let’s go over the steps to configure each to work with Magento.
Nginx configuration:
Although you can use multiple virtual host files with Nginx, using a single file will help you keep things simple and easy to manage. Log in to your server as a user with superuser privileges and follow these steps:
- Using your preferred text editor, create a new file as /etc/nginx/sites-available/magento and add the following contents to it.
<code>
map $http_host $MAGE_RUN_CODE {
default ”;
german.yoursite.com german;
}
server {
listen 80;
server_name yoursite.com german.yoursite.com;
set $MAGE_ROOT /var/www/html/magento2;
set $MAGE_MODE developer;
set $MAGE_RUN_TYPE website; #or set $MAGE_RUN_TYPE store;
include /var/www/html/magento2/nginx.conf;
}
</code>
- Save the file and exit the text editor.
- Next, test your Nginx configuration by running the following command in the terminal:
<code>
# sudo nginx -t
</code>
In case of errors, check the syntax of your configuration files. If it returns successful, move on to the next step.
- Create a symbolic link to the previously created file in the /etc/nginx/sites-enabled directory. To do this, copy and run the following command in your terminal.
<code>
# sudo ln -s /etc/nginx/sites-available/magento /etc/nginx/sites-enabled/magento
</code>
- Next, we need to modify the conf.sample file inside your Magento installation directory. To do this, create a copy of the nginx.conf.sample file and then add the following two lines under the ‘# PHP entry point for main application’ section before the ‘include fastcgi_params;’ line.
<code>
fastcgi_param MAGE_RUN_TYPE $MAGE_RUN_TYPE;
fastcgi_param MAGE_RUN_CODE $MAGE_RUN_CODE;
</code>
- Finally, make sure to reload nginx, so that all your changes are updated.
Apache configuration:
If you’re using an Apache web server, you can use the following instructions to set up your virtual host.
- Using a text editor of your choice, open the /etc/httpd/conf/httpd.conf file on your server.
- Locate the <VirtualHost *:80> section and create new virtual hosts after any existing ones as follows.
Here’s a sample of what your file might look like after you’ve added in the additional data:
<code>
<VirtualHost *:80>
ServerName yoursite.com
DocumentRoot /var/www/html/magento2/pub/
</VirtualHost>
<VirtualHost *:80>
ServerName german.yoursite.com
DocumentRoot /var/www/html/magento2/pub/
SetEnv MAGE_RUN_CODE “german”
SetEnv MAGE_RUN_TYPE “website”
</VirtualHost>
</code>
- Finally, save your changes, exit the text editor, and restart Apache to update your changes.
Step 9: Point your subdomains to your server
If you have DNS set up for your store, point your newly configured subdomains to your server’s IP address.
If you haven’t set it up, add a static route to the hosts file on your server in the following format:
<code>
<ip address> german.yoursite.com
</code>
And just like that, you will have regained access to your admin panel, and your newly configured Magento 2 multistore will be live.
Bonus tip
Setting up your Magento 2 multistore using Docker containers can be extremely beneficial to your website’s performance. If you find it tricky to DIY, it might be wise to seek help from a Magento development agency instead.
Wrapping it up
Magento 2 multistore is extremely easy to configure as long as you follow the steps outlined in this article.
Using one admin panel to rule them all, you can set up multiple stores for your business and even customize how your catalog is set up for each website and store.
Properly configuring your multistore setup will help you minimize unwanted downtime and reap the rewards of using Magento 2 as your ecommerce platform.